Molding Casting
SEMANA 13: Molding and Casting
Moldeo y Fundición
During this week I explored the process of molding and casting, a technique widely used in manufacturing to reproduce objects by creating molds and pouring liquid materials that subsequently solidify.
The objective of this activity was to understand the complete process flow, from the digital design of the mold, the manufacture of the master mold, to the production of a final part by casting.
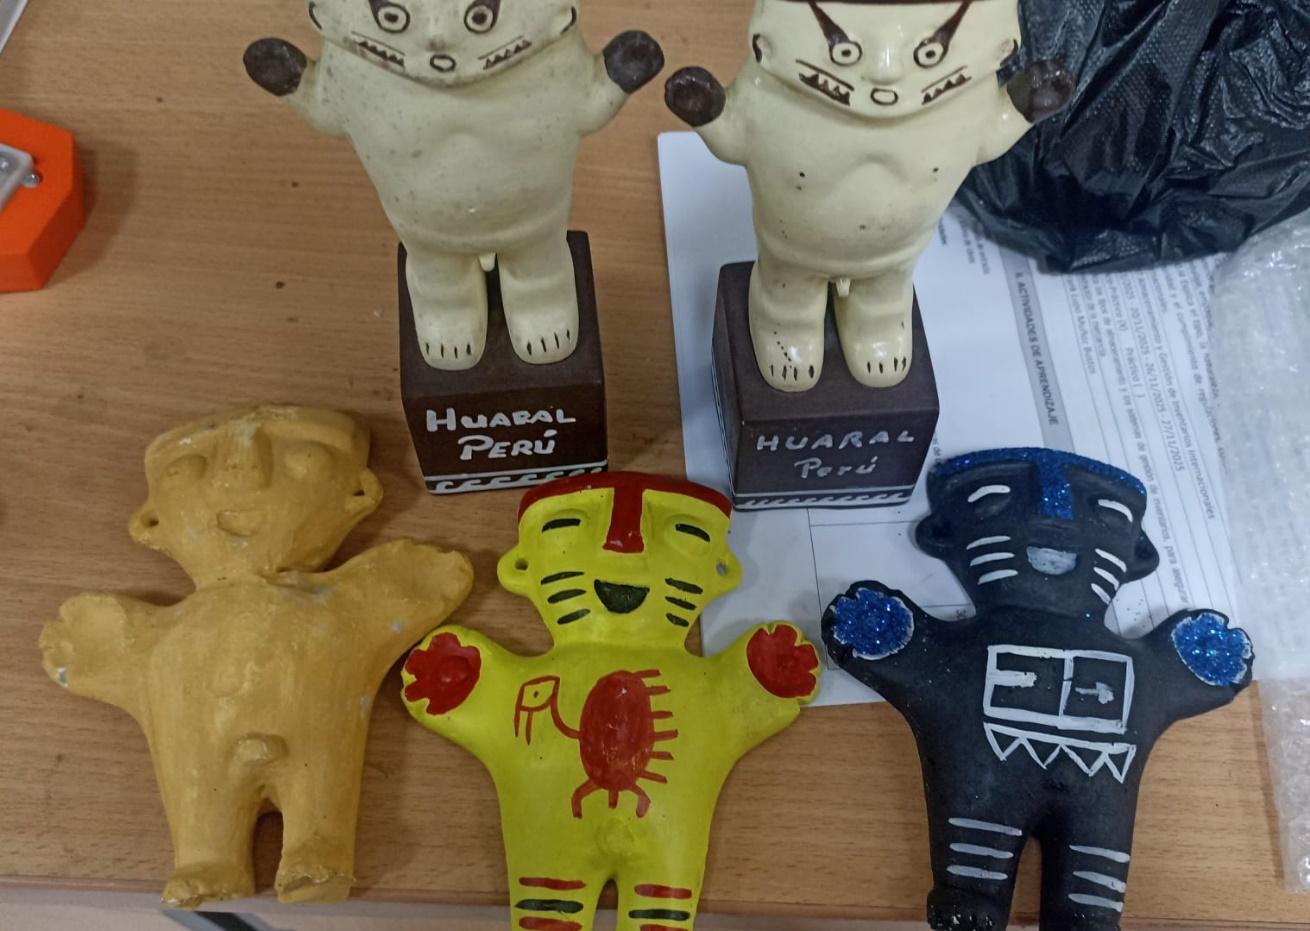
For this task I decided to reproduce a small figure inspired by a Cuchimilco Figurine, a representative artifact of the Chancay culture of ancient Peru. These figures were traditionally used as ceremonial objects and symbolic guardians.
Through this exercise, I sought to combine digital fabrication techniques with the reinterpretation of a cultural element, using modern materials to reproduce the form of this traditional figure.
Main Result
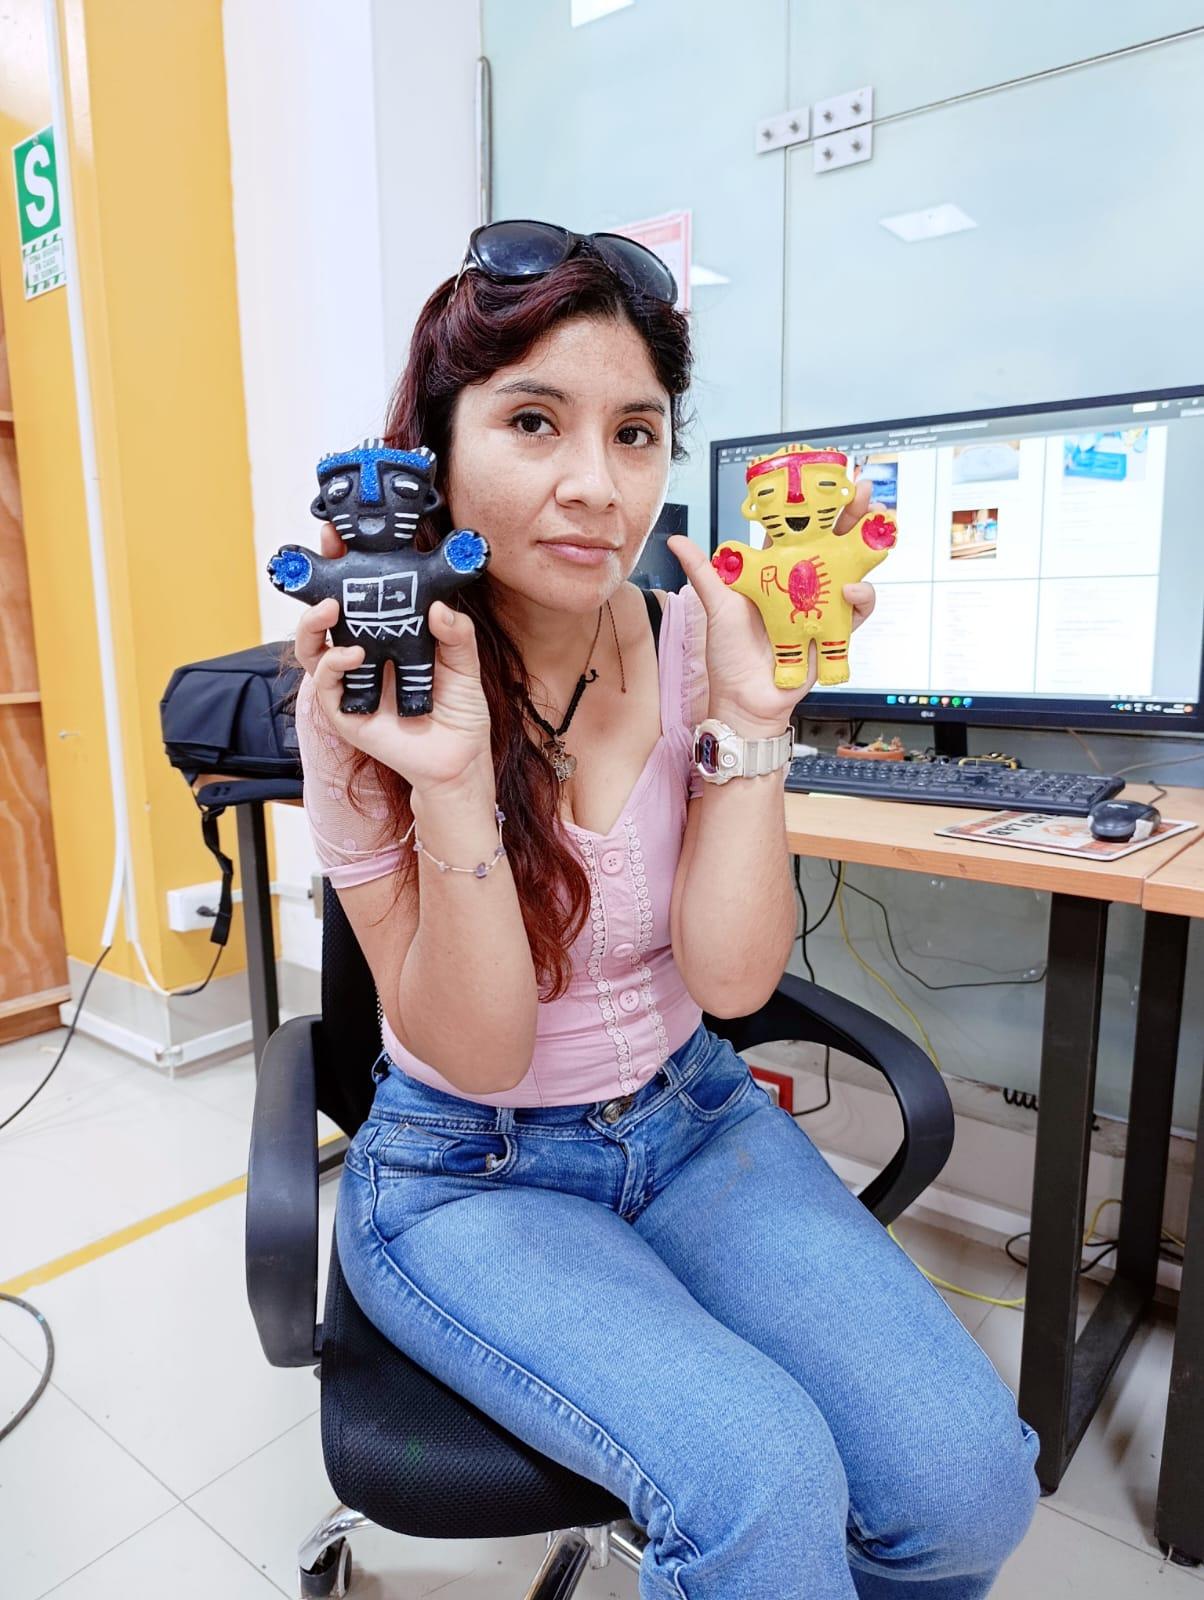
Figure 1. Final result showing the silicone mold and the casted Cuchimilco figure produced during the molding and casting assignment.
Group Assignment
Material testing and safety review
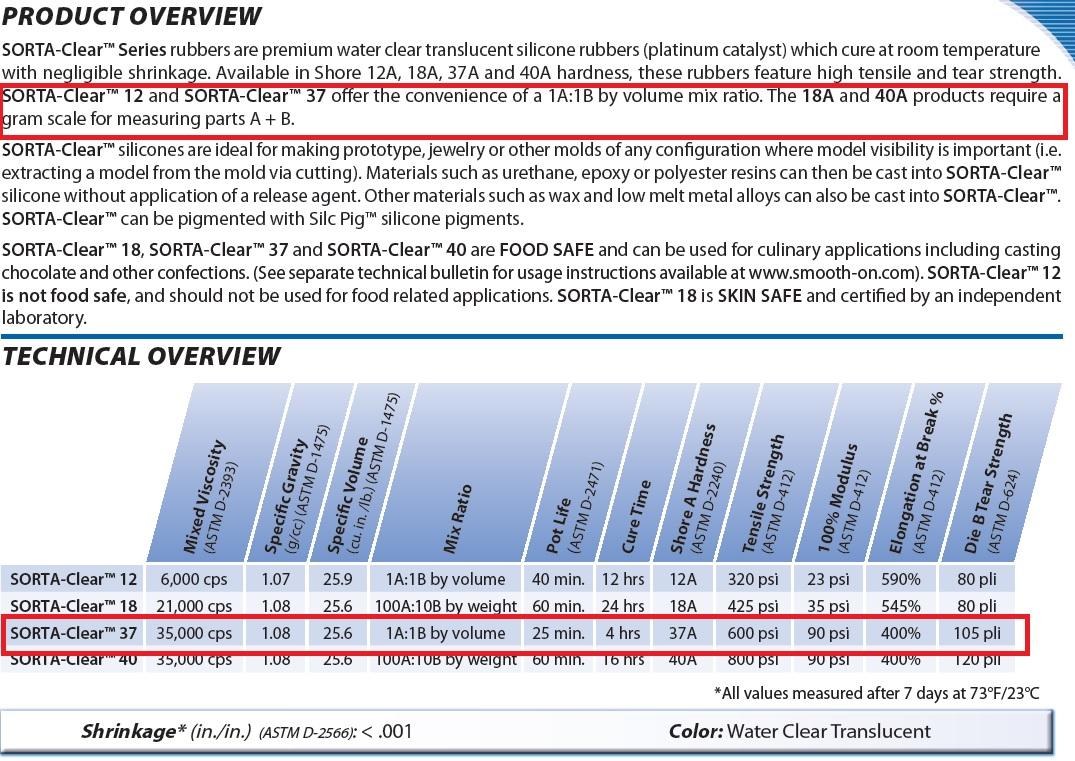
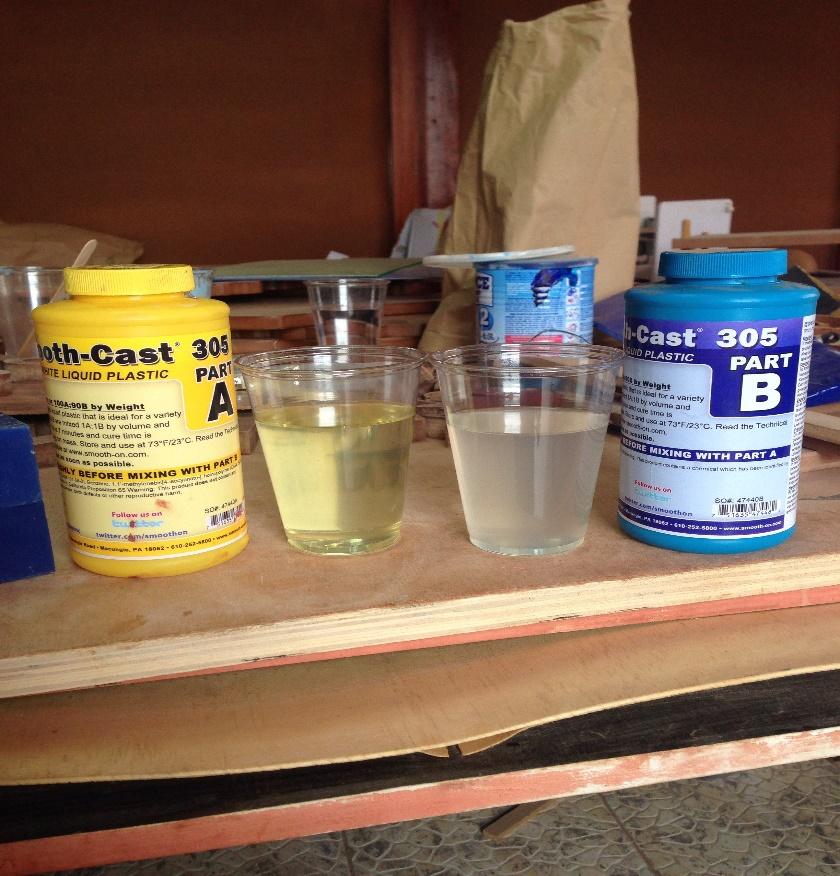
As part of the group assignment, we reviewed the safety data sheets (MSDS) and technical sheets (TDS) of materials used for molding and casting.
Estas hojas contienen información importante sobre:
safety precautions
working temperature
curing time
safe handling of materials
During this activity we analyze different materials used to create molds and make castings, evaluating their properties and comparing their results.
This analysis allowed us to understand the importance of selecting the appropriate material depending on the type of part to be manufactured.
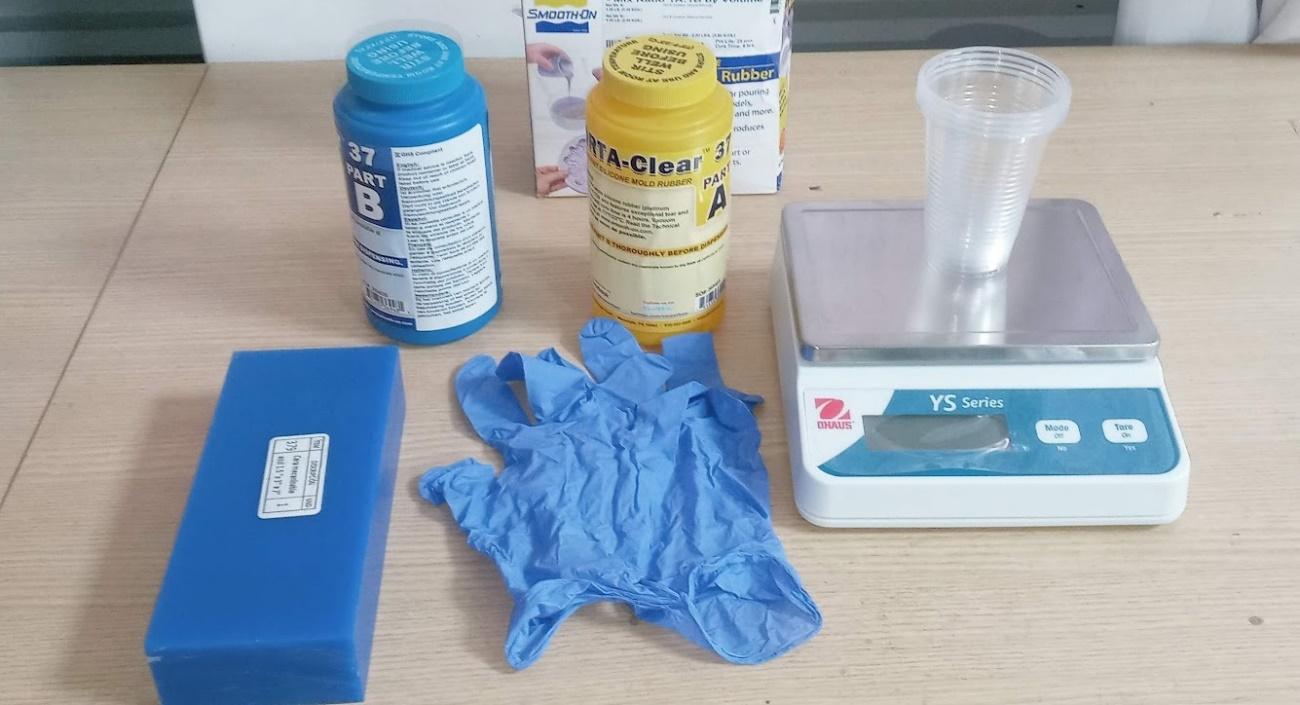
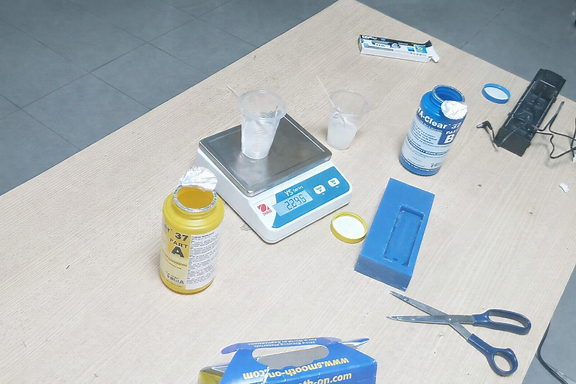
The materials we have at Fab Lab HUANDO (silicone, resin, containers, gloves), are Sorta Clear 37 silicone. We look at the product's technical sheet.
Texto debajo:
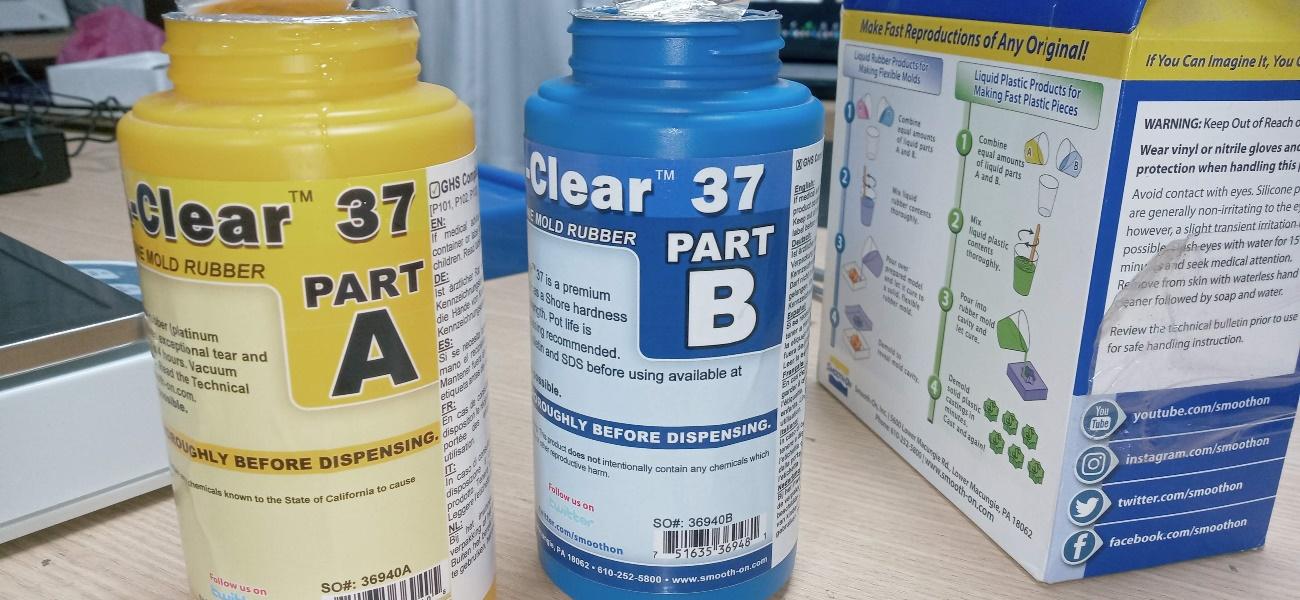
Figure 2. Materials used for molding and casting experiments during the group assignment.
ASIGNACIÓN INDIVIDUAL
Design and manufacture of the Cuchimilco mold
In this individual assignment I developed the digital design of a figure inspired by the Cuchimilco Figurine using the Onshape parametric modeling platform.
The objective was to create a three-dimensional model that would later be used to design the manufacturing mold. This mold would allow the figure to be reproduced through a molding and casting process using silicone and resin.
This exercise allowed us to understand the complete flow of the digital manufacturing process: parametric design, mold generation, mold manufacturing and casting of the final part.
STEP 1: Design Analysis
Before beginning the modeling, I analyzed the geometry of the Cuchimilco figure to identify its main proportions and define the dimensions that would allow creating a suitable mold for its reproduction.
This initial analysis is important to ensure that the digital model is consistent and that the subsequent manufacturing process is viable.
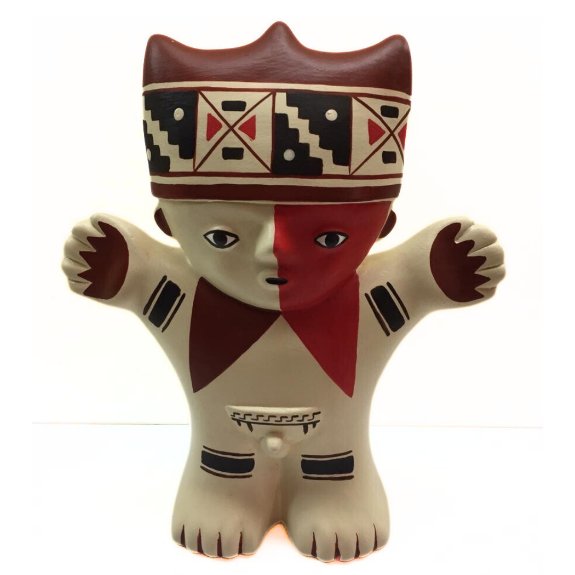
Reference image of the Cuchimilco that you are going to model.
Figure 1. Reference image used to analyze the proportions of the Cuchimilco figure before starting the CAD modeling process.
STEP 2: Creating the initial sketch
Once the proportions were defined, I started the modeling process in Onshape by creating a base sketch. At this stage the main lines that define the outline of the figure were established.
Arrow 1: Creation of the initial sketch. Arrow 2: Using lines to define the general shape. Arrow 3: Using arcs to soften the geometry of the design.
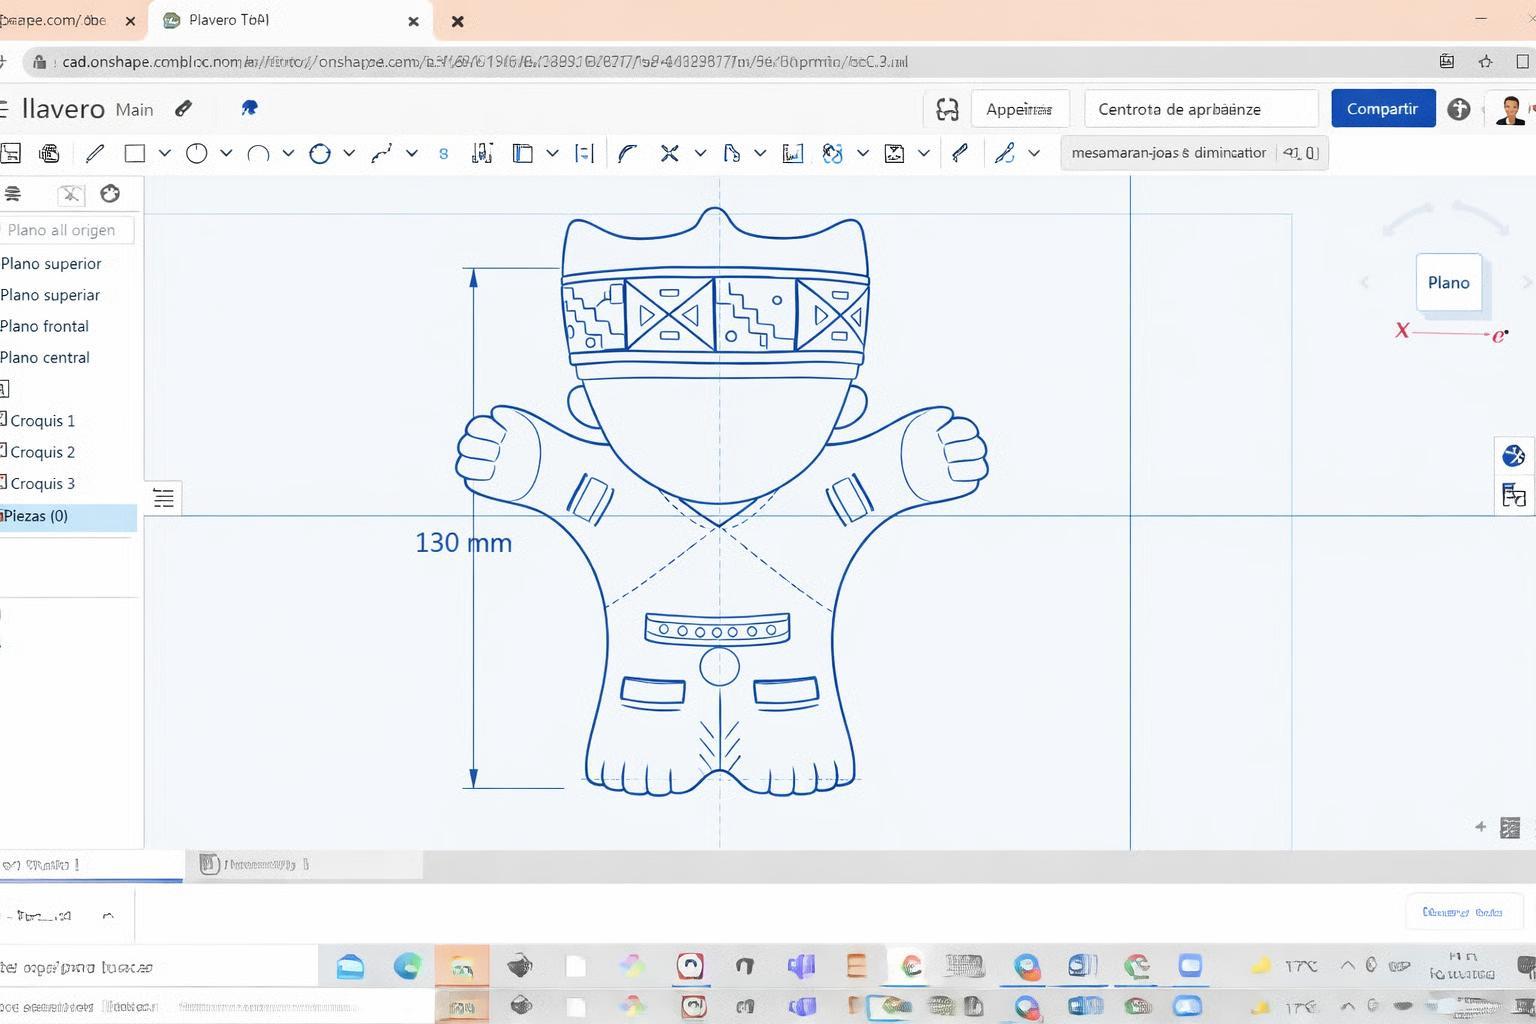
Screenshot of the sketch in Onshape.
Figure 2. Initial sketch defining the main profile of the Cuchimilco figure.
STEP 3: Generation of the 3D model
After completing the sketch, I used the revolve tool to generate the three-dimensional volume of the piece.
Arrow 1: Selection of the revolution tool. Arrow 2: Selection of the axis of revolution. Arrow 3: Selection of the profile to generate the solid.
With this procedure the two-dimensional profile is transformed into a three-dimensional model.
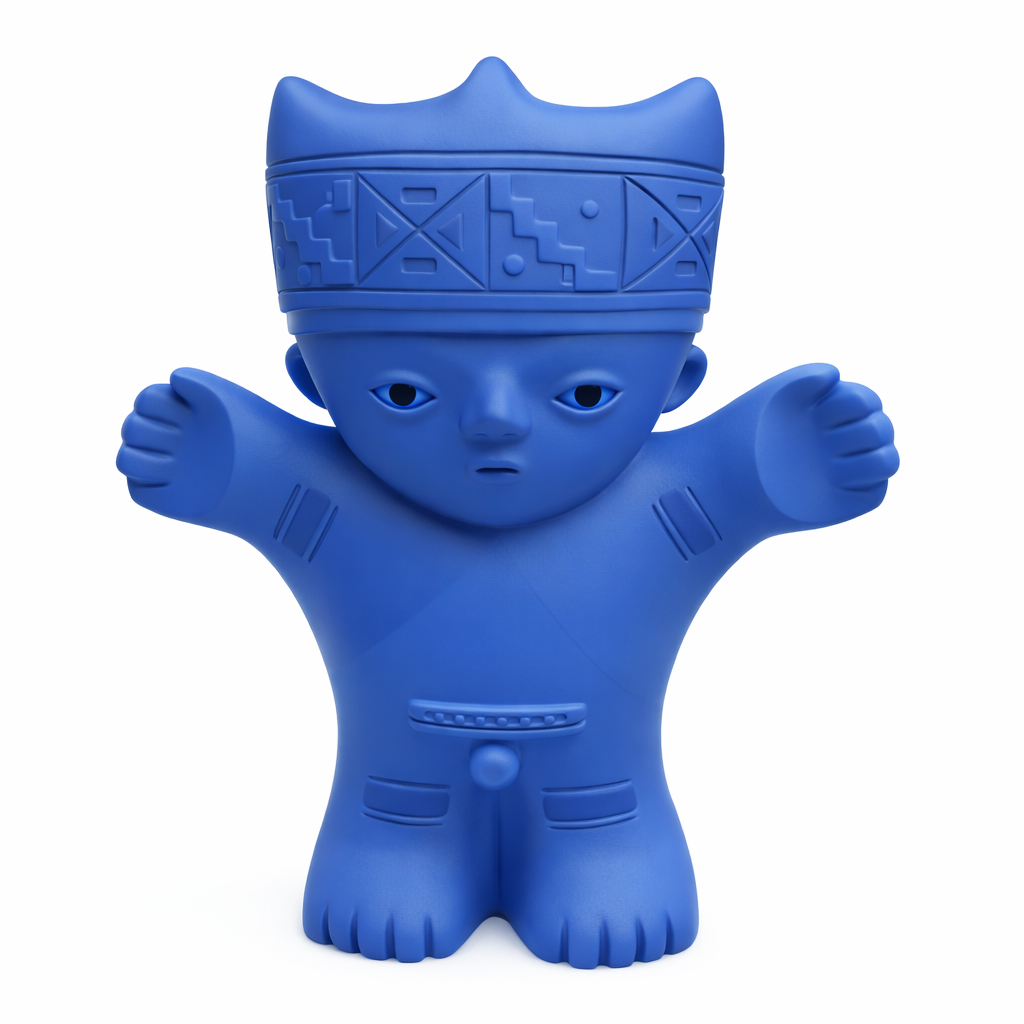
Capture of the generated 3D model.
Figure 3. 3D model generated using the revolve tool in Onshape.
STEP 4: Mold base design
Subsequently, a new sketch was created to design the base of the mold where the figure will be housed. In this step, the dimensions of the container that will allow the mold to be manufactured were defined.
Capture of the sketch of the mold base.
Figure 4. Sketch used to define the base structure of the mold.
STEP 5: Extrusion of mold container
Using the extrusion tool, the sketch was transformed into a volume that will function as a box or container for the mold.
This container will allow the molding material to be later poured.

3D model of the mold box.
STEP 6: Adjustment of dimensions
At this stage adjustments were made to the dimensions of the mold to ensure that the Cuchimilco figure fits correctly inside the container.
These adjustments ensure a proper casting process.
Capture of the measurement adjustment.
STEP 7: Generation of mold negative space
Subsequently, the extrude remove tool was used to create the negative space where the figure will be housed.
This step is essential since it defines the cavity where the casting process will be carried out.
STEP 8: Mold Base Design
The offset tool was used to generate the base of the mold, which allows the structure to be reinforced and stability improved during the casting process.
STEP 9: Mold Extrusion
Subsequently, the final extrusion of the mold container was carried out to generate the complete volume that will be used in the manufacturing process.
STEP 10: Final thickness adjustment
Final adjustments were made to the mold thickness to ensure its structural strength during the molding process.
STEP 11: Design of channels or details
Small geometric details were added to improve the molding process and facilitate the flow of material during casting.
STEP 12: Extrusion of details
The elements created in the previous step were extruded to fully integrate them into the mold design.
STEP 13: Applying rounding
To improve the finish and avoid abrupt edges, the fillet tool was used in different parts of the design.
STEP 14: Export the model
Once the design was finalized, the file was exported in STL format for later manufacturing using digital fabrication tools.
STEP 15: Preparation for manufacturing
The file was prepared for the manufacturing process using print preparation or machining software.
STEP 16: Manufacturing process
During this stage the mold was physically produced using digital manufacturing tools available in the laboratory.
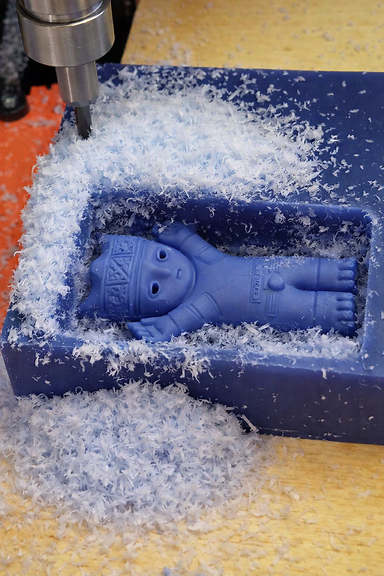
Photo of the machine working.
Figure . Fabrication process of the mold using digital manufacturing tools.
STEP 17: Mold result
After the manufacturing process, the physical mold was obtained that will be used for the molding process.
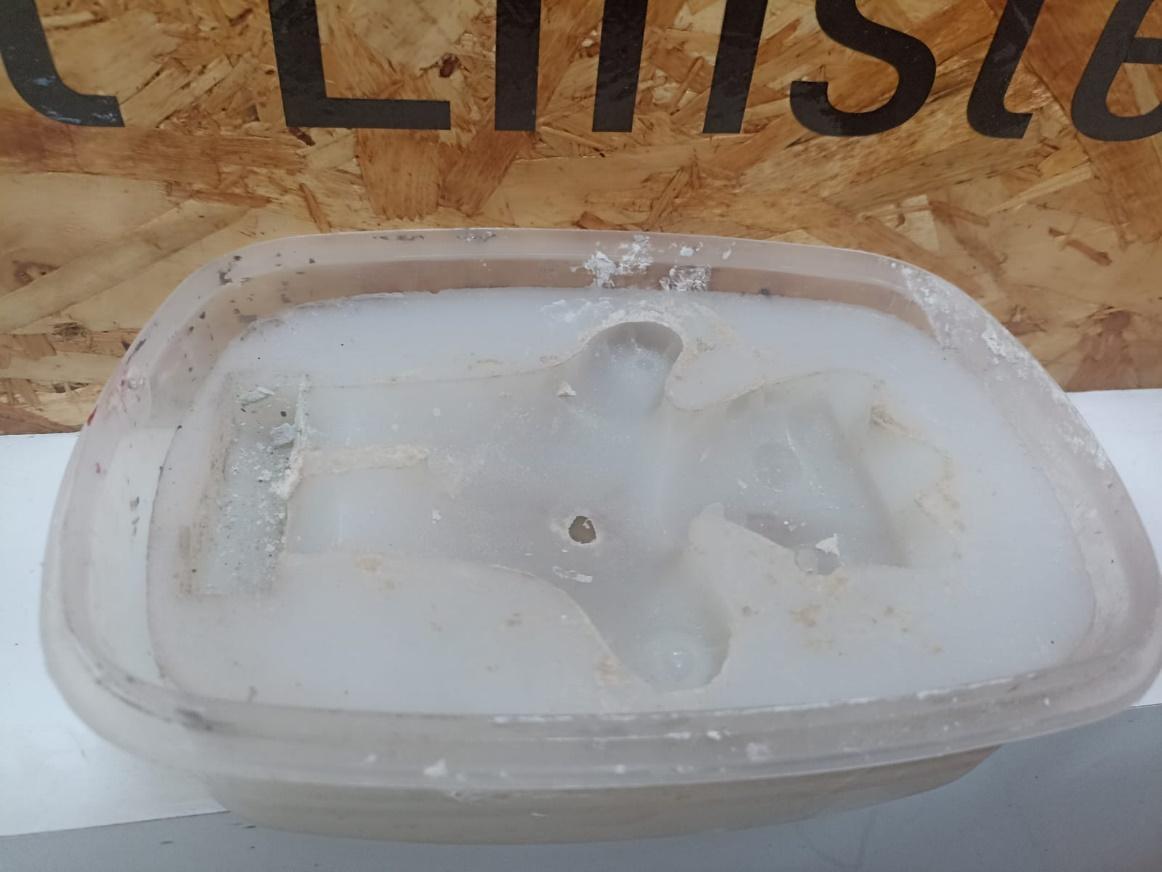
Molde físico terminado.
Figure Fabricated mold ready for the molding process.
STEP 18: Preparation of the silicone
To create the flexible mold, two silicone components were used that were mixed in equal proportions.
Mezclando silicona.
Figure 18. Mixing silicone components to create the flexible mold.
STEP 19: Silicone Pouring
The silicone was carefully poured into the master mold.
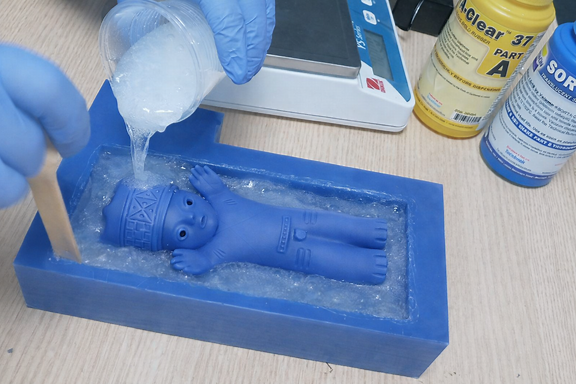
Vertiendo silicona.
Figure Pouring silicone into the mold.
STEP 20: Curing time
After pouring, the silicone was allowed to sit for the time necessary to complete the curing process.
STEP 21: Casting the piece
Once the silicone mold was finished, the casting process was carried out using resin.
PASO 22: Resultado final
Finally, the piece was removed from the mold, obtaining a reproduction of the Cuchimilco manufactured through the molding and casting process.
